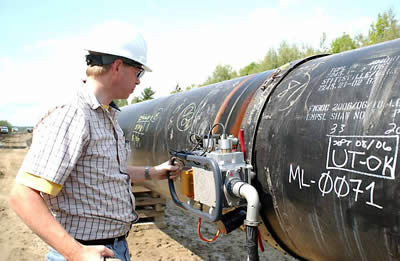
 GAMMA Inspection offers a range of Automated Ultrasonic Testing (AUT) services including Time of Flight Diffraction (ToFD), Phased Array (PA), corrosion mapping, and complete weld inspection. AUT of welds is accomplished by the mechanization of a portable scanner populated with ultrasonic probes and a sophisticated data acquisition system. AUT is widely recognized as the most accurate method of detecting and sizing weld flaws in high-production environments.
Ultrasonic inspection of pipeline girth welds using the PipeWIZARD® system offers fast scanning speed, reduced weld-to-weld inspection times, operational flexibility, low operating costs, and extremely high reliability. Zonal pulse echo, coupled with ToFD and sectorial scanning delivers the ability to efficiently and reliably detect the presence of both fabrication and service-induced defects while providing the data necessary for accurate assessment of their size.
GAMMA Inspection provides AUT weld inspection services using production-proven hardware and certified operators.
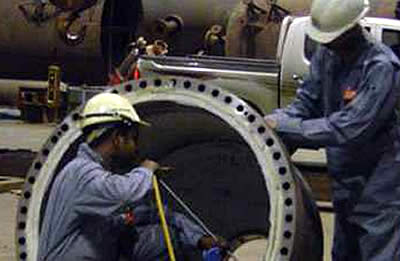 Radiographic Testing is used to ensure the integrity of welded butt joints in piping, structural, tank, and pressure vessel work.
Radiography techniques employed by GAMMA Inspection include:
- Internal pipeline crawlers
- External x-ray and gamma ray equipment
- Digital radiography
- Close-proximity radiography (LO-RAD system)
Additional radiography services include the digitization of existing radiographic films, converting film to digital images that can be stored and viewed electronically; the replacement of conventional radiographic film and chemical processing with a filmless technique using radio sensitive plates from which latent images can be digitally scanned and stored; and real-time radiography using integrated x-ray camera and imaging technology.
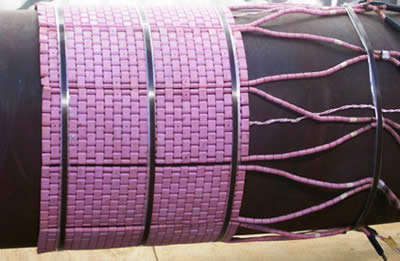 To help clients overcome thermal challenges, GAMMA Inspection provides electrical surface heating, refractory dryout and curing, ladle drying, and onsite pre- and post-weld heat treatment. We also offer high-velocity fuel-fired heat treatment, furnace heat solutions, and thermal stress analysis.
In the field of heat treatment and thermal technology, GAMMA Inspection has the manpower and equipment to cover all design, engineering, treatment, inspection, and maintenance work, with the power to work within major shutdowns should the need arise. Our ongoing commitment to exceptional onsite service and the highest level of quality has earned us a worldwide reputation for heat treatment excellence.
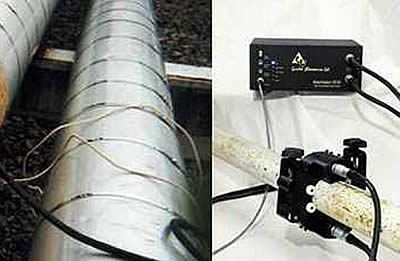 Wavemaker Pipe Screening System
The GAMMA Inspection Wavemaker Pipe Screening System is a guided ultrasonic testing system designed for rapid screening of long lengths of external or internal pipe corrosion as well as axial and circumferential cracking. Wavemaker can be used on a wide variety of pipes including those that are buried or insulated. Hundreds of meters of pipe can be inspected in one day and 100% of the pipe wall is inspected during the test. Wavemaker testing can be done while a plant is in operation with minimal disruption.
Wavemaker uses a new two-ring probe array proven to be highly effective in detecting corrosion while also reducing equipment costs. These probe arrays can be attached to the pipe in less than one minute.
The Wavemaker system allows rapid full-coverage pipe screening, delivering cost-effective inspection in difficult-access locations. With the ability to detect cracks and general metal loss, Wavemaker is ideal for a number of applications including:
- Detection and positioning of corrosion under insulated pipes without removing lagging other than for probe application
- Screening of inaccessible areas such as sleeved road crossings and wall penetrations
- Screening of onshore and offshore pipework, even in tightly packed racks
- Riser inspection
Permanently Installed Monitoring System (PIMS)
GAMMA Inspection’s Permanently Installed Monitoring System (PIMS) is an innovative pipeline inspection and monitoring system that uses guided ultrasonic waves to screen for corrosion, circumferential cracking, and general loss of cross-sectional wall thickness. PIMS inspects 100% of the pipe wall with a range of dual-directional guided waves that are equally sensitive to internal and external defects. PIMS offers an array of advantages:
- Completely non-intrusive with no effect on production
- Large sections of pipe can be inspected from a single test location
- Can inspect un-piggable or inaccessible pipeline sections
- Fixed units can be retrofitted to in-service pipelines
- Mobile units can be deployed quickly to high-risk areas by WROV
- Real-time analysis of data and permanent records
A cost-effective method of monitoring areas which are difficult to access, PIMS can be installed on any pipe, but is particularly useful in areas where future access will be difficult:
- Buried pipe
- Pipe in ducts under roads/rail lines
- Subsea applications prior to installation
- Pipes that will be in contaminated areas
PIMS has revolutionized the external screening of subsea pipelines, jumpers, risers, and manifold pipework while delivering critical insight into internal conditions, facilitating focused complementary inspections, and enabling confident integrity management.
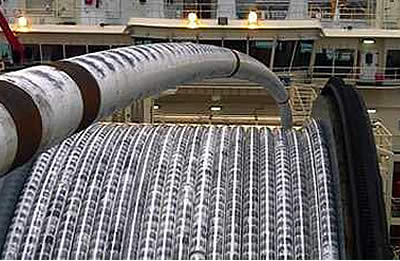 GAMMA Inspection hardness testing covers hardness, replica, and dimension measurements and is conducted with portable and semi-portable equipment. GAMMA Inspection utilizes today’s newest optical Through-Indenter-Viewing (TIV) technology, opening up new fields of application for mobile hardness testing in which conventional instruments cannot produce reliable results. Typical hardness testing applications include:
- Hardness testing on different materials without calibration
- Hardness testing on thin components (e.g., sheet metal, coils)
- Testing on hardened surfaces
- Testing on elastic materials
GAMMA Inspection’s advanced hardness testing system ensures that we consistently meet the quality and performance requirements of a variety of customers in a timely, cost-effective manner.
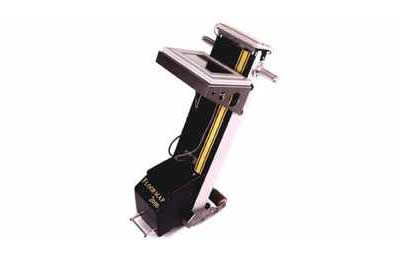 An inspection technique that detects volumetric changes, Magnetic Flux Leakage (MFL) testing is facilitated by tank floor mapping utilizing today’s latest computerized equipment. With MFL, a strong magnet induces a magnetic field in the material. On a corrosion spot, a leakage field will arise. The larger the corrosion, the larger the leakage field.
After the fairly quick MFL inspection is complete, the suspect areas of the tank floor surface will be quantified by slower but more accurate Ultrasonic Testing (UT).
Silver Wing Floormap MFL 2000
The Floormap MFL 2000 tank floor scanner is one of a new generation of MFL systems designed for the inspection of bulk liquid storage tank floors. The system takes advantage of the latest developments in magnet design to deliver enhanced performance on thicker floor plates (10mm and above).
The 2000’s ergonomic mechanical design allows the magnet carriage to be “broken” from the floor with much less effort than previous designs, despite its increased magnetism. An onboard computer allows full data acquisition of signals detected by MFL in such a way that mapping of defect indications can then be carried out through graphical reporting software. This software allows the grouping of defects according to severity in operator-definable color-coded bands.
The 2000 allows the cross-checking of pitted areas through an ultrasonic technique in order to confirm material loss (as a percentage of plate thickness) and verify MFL banding. Any variation between the MFL banding and the ultrasonic results can be corrected for in the reporting software. The 2000 is designed to detect under-floor conical pit or lake-type corrosion represented by an artificial reference hole 40% deep. Under ideal conditions pitting of approximately 20% loss in a 6mm plate can be detected and sized.
Floor thicknesses over 12.5mm and up to 20mm can be inspected by switching the 2000 to manual mode. It is not possible to quantify or map corrosion in these thicker plates due to the lower flux levels induced in the plate. It is however possible to detect corrosion 50% deep or greater in material up to 15mm thick and between 60 and 70% deep in materials up to 20mm thick. A secondary NDT method, normally UT, is then used to quantify the material loss.
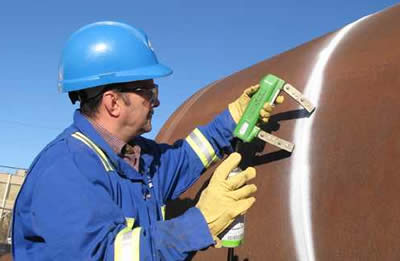 Magnetic Particle Inspection (MPI) is used on cut and beveled pipe ends before welding to make sure there are no parent material flaws. MPI is also used by GAMMA Inspection to detect surface cracks after grinding or machining operations.
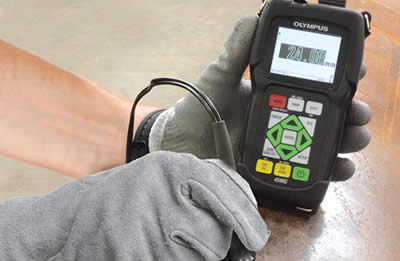 Single- and multi-probe Manual Ultrasonic Testing (MUT) is ideal for wall thickness checks and is also used to test for laminations in pipe ends, crack detection, and weld defect inspection. GAMMA Inspection handheld Phased Array systems enable corrosion mapping of components, and they also provide advanced weld inspection capabilities.
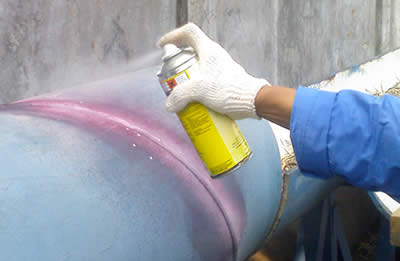 A highly effective surface analysis technique, Penetrant Testing (PT) is used by GAMMA Inspection to detect cracks and other surface breaking flaws. Special equipment is available for the testing of turbines, compressors, and pumps.
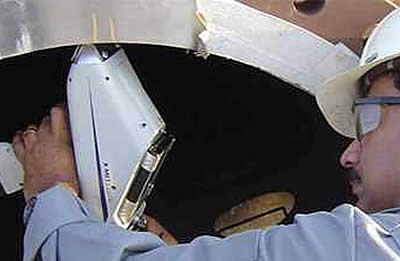 GAMMA Inspection utilizes Positive Material Identification (PMI) to verify that a given material is in accordance with specification. It is not recommended that PMI be used on an item with no material certificate (each PMI machine has its own characteristics).
SPECTROTEST
This machine is highly accurate and will also identify carbon content if required. It is mainly used for materials with an L or H grade and aluminum, Inconel, Incoloy, Hastelloy, and low-alloy steel. Weighing approximately 75kg, the SPECTROTEST is not designed for working at heights or confined spaces. Calibration is necessary to optimize the machine prior to testing. All results can be stored and printed.
SPECTROSORT
This machine is only used for stainless steels with no L or H grade and low-alloy steels. No carbon reading is available for this machine. Operating via battery pack, the SPECTROSORT is ideal for site work and at heights. Calibration is necessary to optimize the machine prior to testing. Up to 3 hours of testing can be done with a single battery.
Thermo TN Alloy Pro
This lightweight state-of-the-art machine can be used at heights and onsite. It can be used on welds, bolts, nuts, etc. and also on powders and turnings. The TN Alloy Pro is designed to be used on stainless steels with no L or H grade and low alloys, Incoloy, Inconel, etc. It cannot take carbon content. All results can be stored and printed. Up to 6 hours of testing can be done before battery recharge is necessary.
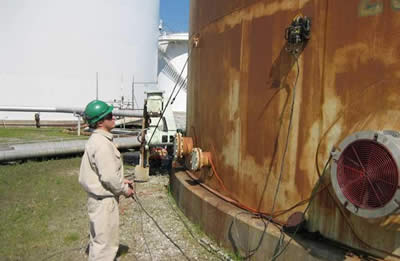 The storage of dangerous goods in tanks must be executed in a safe way. In order to reduce economical as well as environmental risks, a thorough knowledge of tank condition, in particular tank bottom and shells, is of utmost importance.
GAMMA Inspection can provide your installation with added quality, cost reduction, business security, and improved safety for both existing and new installations. Nondestructive testing provides clear insight into the risk of leakage or other safety-critical defects, increasing integrity and safety within the installation and helping avoid undue operating expenses.
Nondestructive testing of storage tanks includes several methods of examining materials, components, and connections in order to identify and quantify material defects and degradations.
Tank Bottom Inspection
For the inspection of tank bottoms GAMMA Inspection offers quick, reliable results by combining two techniques: Magnetic Flux Leakage (MFL) testing and Ultrasonic Testing (UT). Corrosion is detected effectively (MFL) and reliably quantified (UT).
An inspection technique that detects volumetric changes, MFL testing is facilitated by tank floor mapping utilizing today’s latest computerized equipment. With MFL, a strong magnet induces a magnetic field in the material. On a corrosion spot, a leakage field will arise. The larger the corrosion, the larger the leakage field.
After the fairly quick MFL inspection is complete, the suspect areas of the tank floor surface will be quantified by slower but more accurate Ultrasonic Testing (UT).


